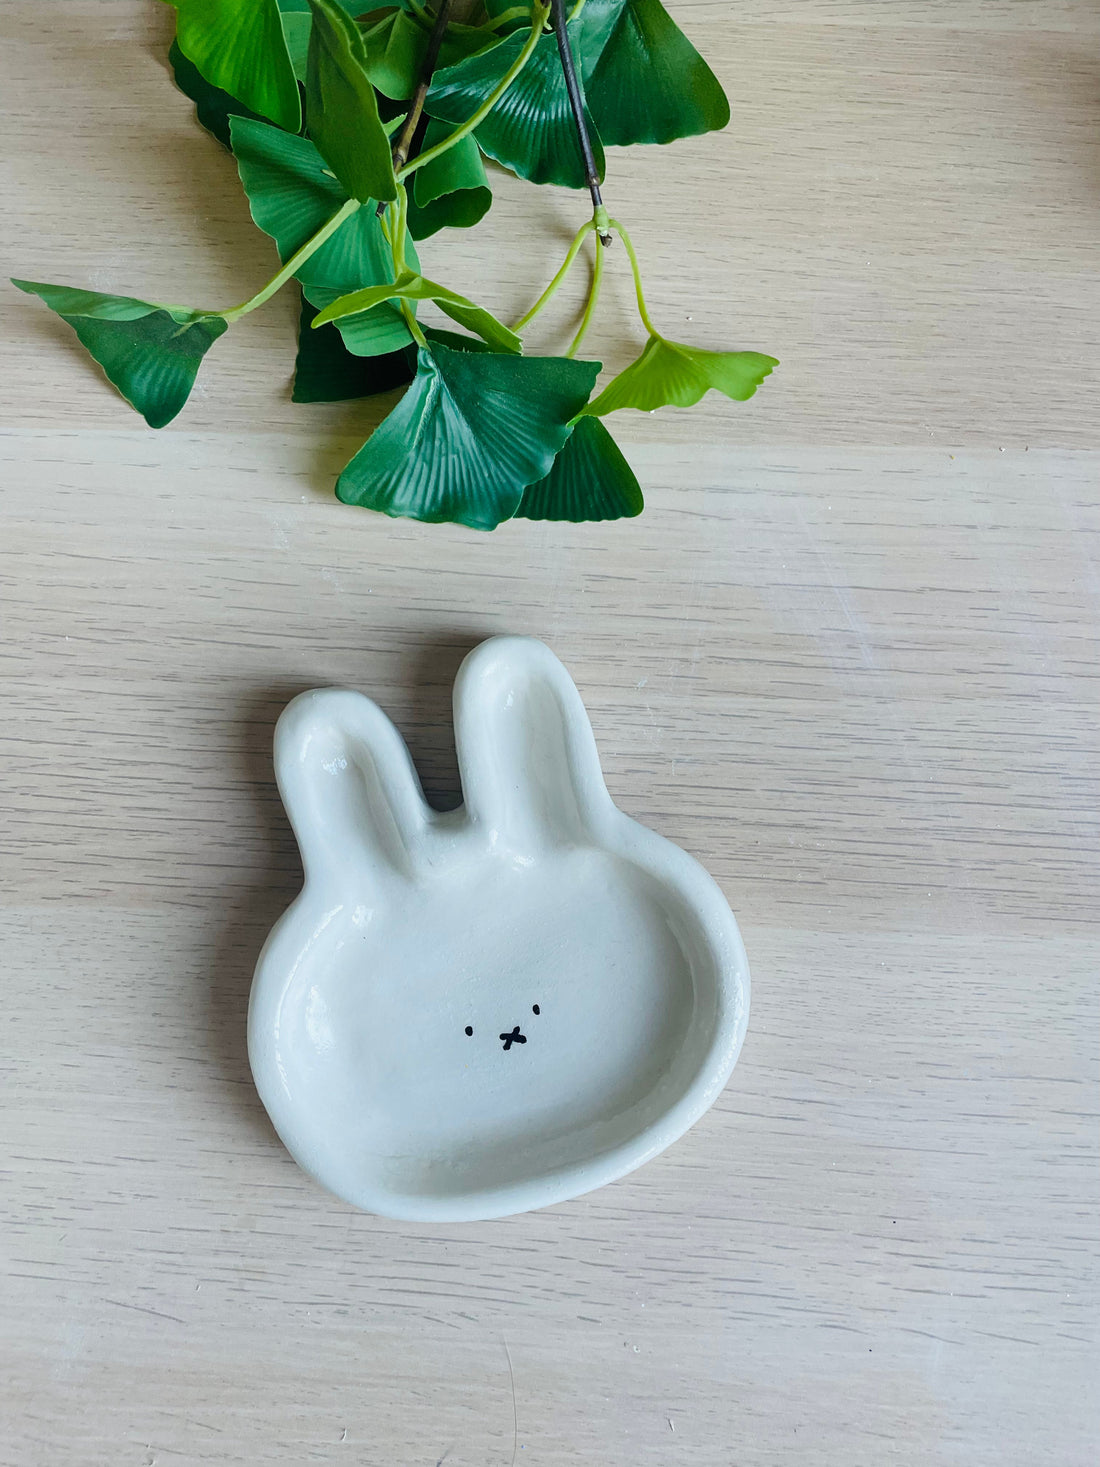
Looking for a whimsical and adorable addition to your craft collection? Say hello to Miffy, your new clay buddy! 🐰✨ This easy air dry clay project is perfect for beginners and a fun way to make a customised trinket dish. Follow our step-by-step guide to bring Miffy to life!
What You’ll Need
- 500g of air dry clay (Our Starter Clay Kit is perfect for this project!)
- Rolling pin
- Bunny-shaped stencil (or freehand for extra creativity)
- Craft knife or clay cutter
- Water bowl
- Paint (black and white for Miffy’s iconic face)
- Glaze (included in all Sunday & Clay kits)
- Wet sponge or soft cloth
Step-by-Step Tutorial
Step 1: Soften the Clay
Start by kneading your air dry clay to make it soft and pliable.
Step 2: Roll It Out
Roll the clay into a smooth ball, then flatten it into a disc about 1-2cm thick. This will become your dish.


Step 3: Shape the Bunny
Use a bunny stencil or freehand the outline of Miffy’s head onto the clay. Carefully cut around the outline with a craft knife.
Step 4: Create the Dish Centre
Cut out a smaller oval or circle from the middle of the bunny's face to form the dish area. Remove the inner section.
 .
. 
 .
. 
 .
. 
Step 5: Refine the Edges
Use your fingers and a bit of water to smooth the edges of the dish and refine the bunny's shape.
Step 6: Drying Stage 1
Let your Miffy dish dry for 24–48 hours. Ensure it’s in a flat, ventilated area. The surface should feel chalky when dry.
Step 7: Smooth the Surface
Use a damp sponge to smooth out any remaining rough spots, then allow it to dry for another 2–3 hours.
Step 8: Paint Miffy’s Face
Using black paint, add Miffy’s simple yet iconic eyes and cross-shaped mouth. Let the paint dry completely.
 .
. 
 .
. 
Step 9: Glaze for the Final Touch
Apply a glossy glaze to seal and protect your dish. Once dry, your Miffy trinket dish is ready for use!